
Welcome! The following is the 15th in a series of 24 lesson plans, Learning the ABC’s through Literature, the 1st year. It was written especially for classroom use within a homeschool co-op, and was designed to teach the alphabet, over the course of a school year, using classic childrens literature. The books are primarily taken from the Five in a Row Curriculum by Jane Lambert, with several others added as well. The plans were designed to give just a little bit more, so it could be more usable within a classroom setting. Teachers questions, printables, craft ideas, classroom handouts, etc are included within all the lessons. This is geared towards a K-1st grade class. If you are interested in something similar for older children, the Learning through Literature series is a more developed concept of this same idea, geared towards 1st-3rd, and also uses mostly Five in a Row books. You can find it here, Learning through Literature, the 2nd year.
O: Owl Moon
What Do I Need:
- Owl Moon
- Black Construction Paper
- Bath Poof (1 or more, depending on class size)
- White Paint
- Construction Cut-outs of beak, Eyes, Legs
- Moon
- Own Fact Sheet (printable version here)
- Letter O Handwriting Sheet (printable version here)
Preview the Book:
Review
Introduce the Book
prairies, woods, marshes, barns, hot and cold. This owl … what can we tell from our picture about where the
owl is from? Cold – must be in the more northern part of the United States.
Farther from Equator, colder.
objects using words “like as seems” Raise hand if they hear a simile
Owl Handwriting Sheet
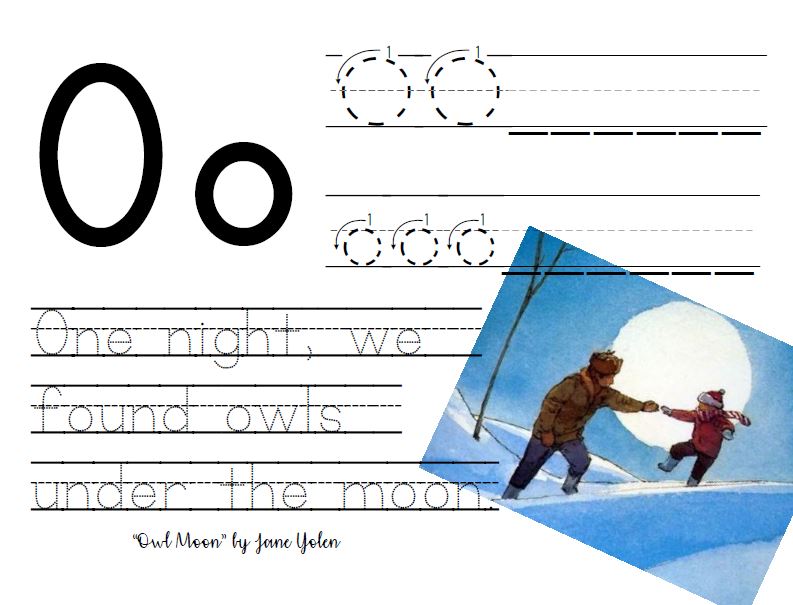 |
| Click here to print |
Owl Craft
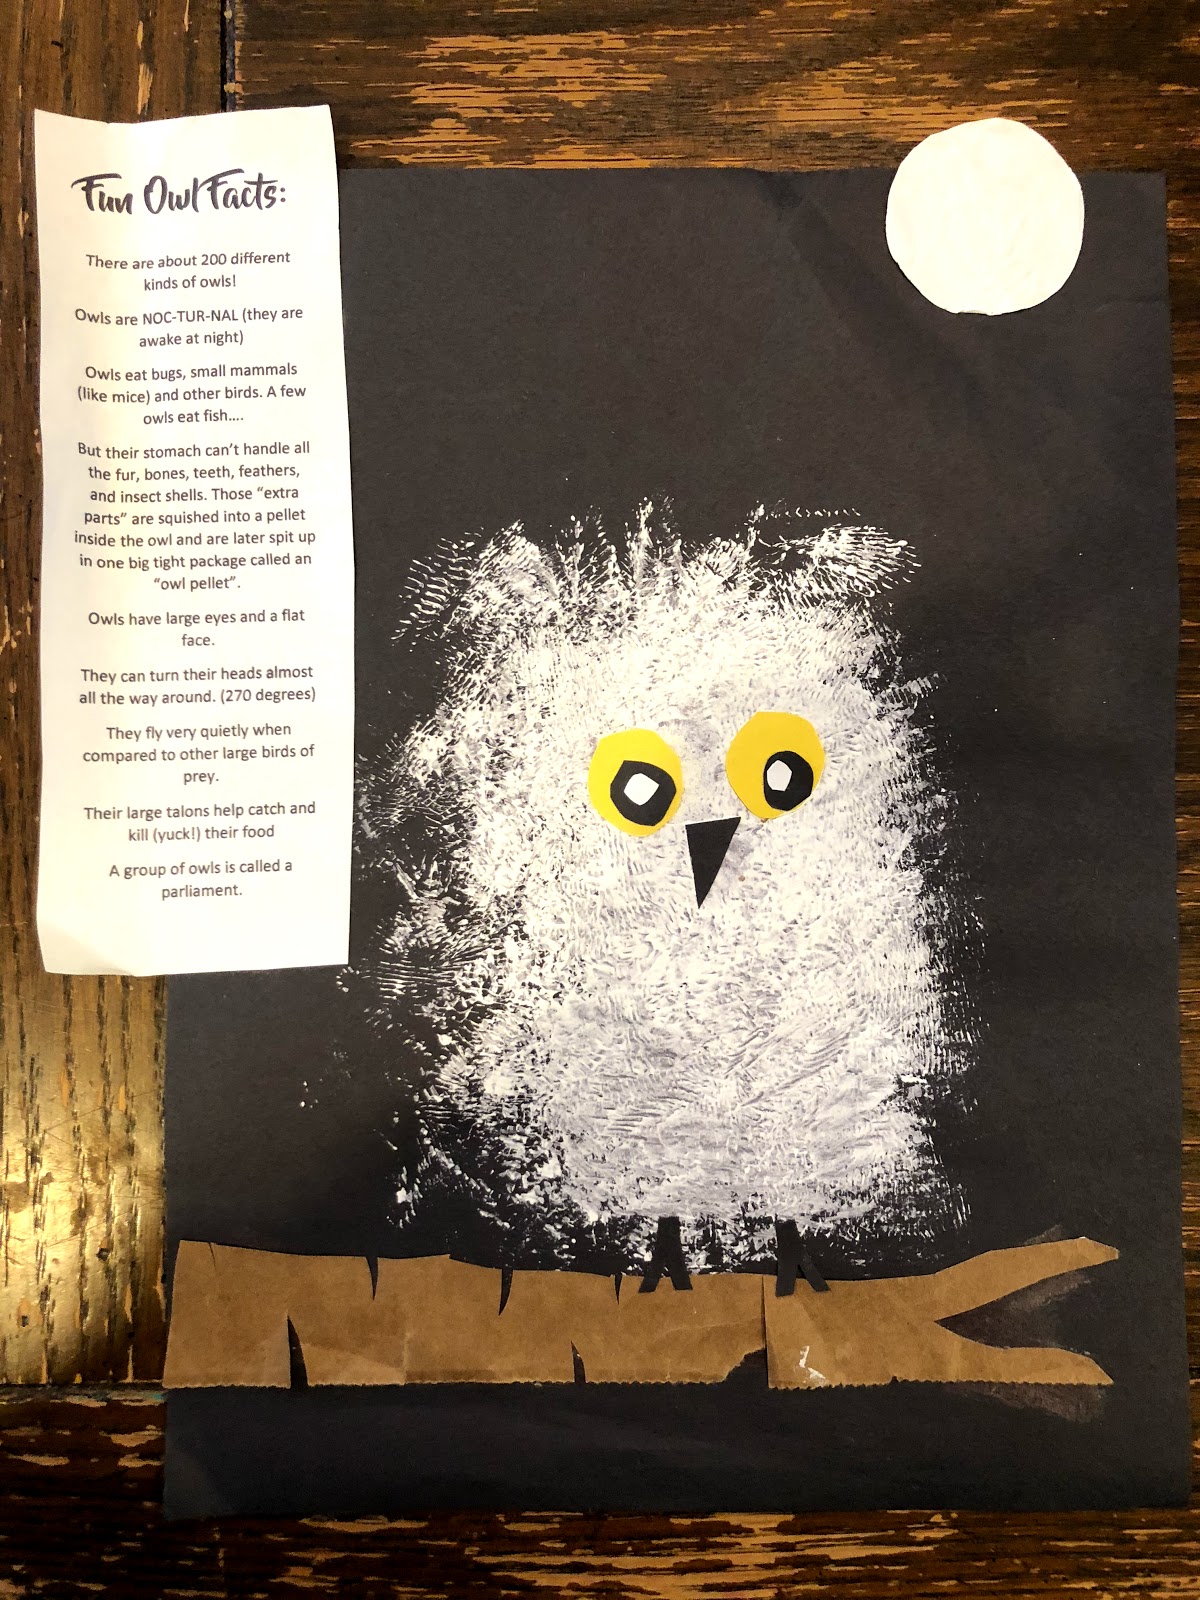
First, take a moment to make your own owl first and show the class. It always helps to have in view the final product.
1) Give each student a black piece of construction paper and a strip of paper bag. Let them make a few cuts in each strip, or cut a branch at the end, etc. Glue the branch down.
2) Use a bath poof dipped in white paint and let each student make the outline of their owl. Encourage them to start small, this shouldn’t take more than a few seconds per student, so it is okay if you only have one or two poofs. Crumpled tin foil or sponges will also work in a pinch, but not quite the same effect.
3) While the white is drying, give each student a moon. Let them crinkle the moon until it is completely squished. Then, flatten the moon out again. You can’t tell in this picture, but if gives the moon a super cool effect that makes it look all textured and “cratery”
4) Glue down the moon, and also the owl facts sheet (this could also go on the back)
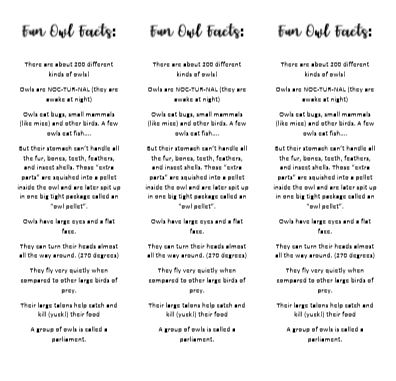 |
| Click here for printable version |
5) Finally, add the eyes, beak, and feet. The eyes can be pre-made, and added all at once if preferred. This will give the paint a little more time to dry. (it will still be wet when you add the eyes, we’re just trying to avoid it being sopping wet.
6) Give it time to dry. Ta-dah! You’re done! (And they ALL looked great! This is one craft that looks impressive without a lot of work)
Click here to return to the Learning the ABC’s through Literature complete booklist and see the general instructions for each lesson.

